Visual Regression Testing: Catching UI Bugs Before Your Users Do
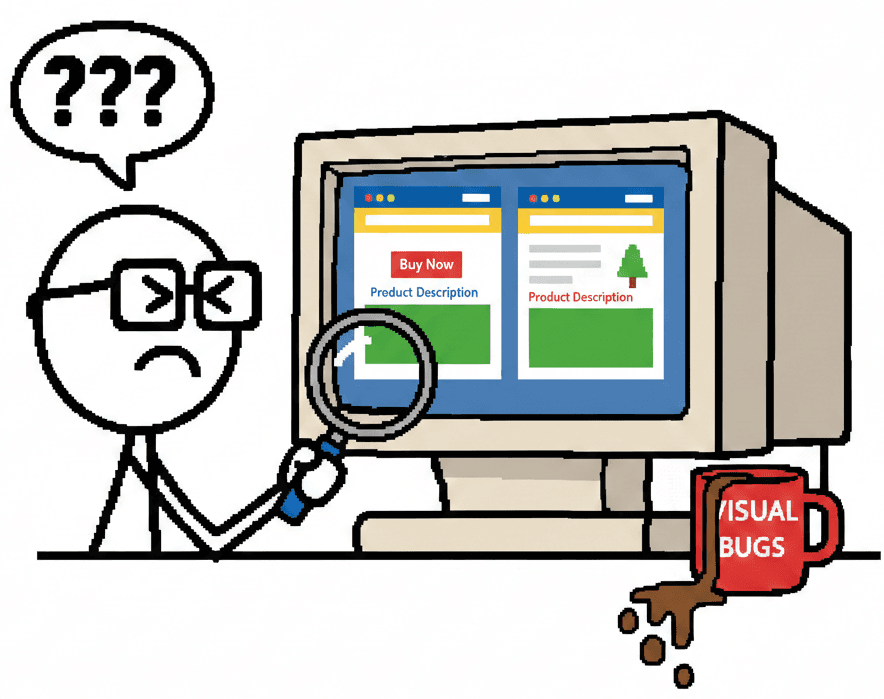
Your functional tests pass. Your unit tests pass. Your integration tests pass. Then a user tweets a screenshot of your homepage with the navigation menu overlapping the hero text. Welcome to the world of visual bugs.
The Problem with "It Works on My Machine"
Traditional automated tests excel at verifying behavior: "Does this button submit the form?" "Does this API return the right data?" But they're blind to visual problems that humans spot instantly:
- A CSS refactor that breaks the layout on Safari
- A dependency update that changes button padding by 2 pixels
- A responsive design that clips text at exactly 768px width
- A z-index conflict that hides critical UI elements
- A font loading race condition that causes layout shifts
You could write assertions like expect(button.padding).toBe('12px'), but that's brittle, time-consuming, and misses the bigger picture. Visual regression testing takes a different approach: compare screenshots.
Two Schools of Thought: Pixel-Perfect vs. Layout-Based
Pixel-Perfect Testing
Pixel-perfect testing compares every single pixel between a baseline screenshot and a new screenshot. If even one pixel differs, the test fails.
Pros:
- Catches absolutely everything, including subtle rendering differences
- Simple concept: images match or they don't
Cons:
- Extremely brittle - anti-aliasing differences break tests
- Dynamic content (timestamps, random IDs) causes false positives
- Different OS font rendering makes cross-platform testing painful
Layout-Based Testing
Layout-based testing uses algorithms to detect meaningful visual changes while ignoring minor variations. Tools like Percy and Chromatic use intelligent diffing to highlight structural changes.
Pros:
- Reduces false positives from anti-aliasing and minor rendering differences
- Focuses on changes users would actually notice
- More stable across different environments
Cons:
- Might miss subtle pixel shifts that matter in your design system
- Requires tuning threshold settings
The verdict: For most teams, layout-based testing with configurable thresholds provides the best balance between catching real issues and maintaining test stability.
Getting Started: Visual Testing with Playwright
Playwright has built-in screenshot comparison capabilities. Here's a basic example:
import { test, expect } from '@playwright/test';

test('homepage looks correct', async ({ page }) => {
  await page.goto('https://example.com');

  // Take a screenshot and compare it to the baseline
  await expect(page).toHaveScreenshot('homepage.png');
});
The first time you run this test, Playwright creates a baseline screenshot in test-results/. On subsequent runs, it compares new screenshots against the baseline and fails if they differ beyond the threshold.
Configuring Tolerance Thresholds
You'll need to configure thresholds to avoid flaky tests. Playwright provides several options:
// playwright.config.ts
export default {
  expect: {
    toHaveScreenshot: {
      // Maximum percentage of pixels that can differ
      maxDiffPixelRatio: 0.02, // 2% of pixels

      // Threshold for individual pixel color difference (0-1)
      threshold: 0.2,

      // Animations can cause flakiness - disable them
      animations: 'disabled',
    },
  },
};
Start conservative (low thresholds) and adjust based on your false positive rate. Different projects have different needs - a pixel-perfect design system needs tighter thresholds than a content-heavy blog.
Handling Dynamic Content
Dynamic content like timestamps, user avatars, and live data will break visual tests. Use masking to exclude these areas:
test('dashboard with masked dynamic content', async ({ page }) => {
  await page.goto('/dashboard');

  await expect(page).toHaveScreenshot({
    mask: [
      page.locator('.timestamp'),
      page.locator('.user-avatar'),
      page.locator('.live-data-widget'),
    ],
  });
});
Masked regions are rendered as solid color blocks in the comparison, so changes there won't fail the test.
Third-Party Tools: Percy and Chromatic
While Playwright's built-in screenshot testing works great, specialized tools offer additional features for teams scaling visual testing.
Percy (by BrowserStack)
Percy integrates with Playwright and provides a web dashboard for reviewing visual changes:
import percySnapshot from '@percy/playwright';

test('homepage visual test', async ({ page }) => {
  await page.goto('https://example.com');

  // Upload screenshot to Percy for comparison
  await percySnapshot(page, 'Homepage');
});
Key features:
- Web-based approval workflow - reviewers can approve/reject changes
- Cross-browser testing - automatically test in Chrome, Firefox, Safari, Edge
- Responsive testing - capture multiple viewport sizes in one snapshot
- Smart diffing algorithm that reduces false positives
Chromatic (by Storybook)
Chromatic is tightly integrated with Storybook but also works with other frameworks:
// If using Storybook, each story becomes a visual test automatically
// .storybook/main.js
module.exports = {
  addons: ['@storybook/addon-chromatic'],
};
Key features:
- Component-level visual testing (great for design systems)
- Interaction testing - capture screenshots after user interactions
- Git-based baseline management - baselines tied to branches
- UI review mode with side-by-side comparisons
When to use third-party tools: If you need cross-browser testing, team collaboration features, or have a large design system, the investment pays off. For smaller projects, Playwright's built-in capabilities are sufficient.
Integrating Visual Testing into CI/CD
Visual tests are most valuable when they run automatically on every pull request. Here's how to set that up:
GitHub Actions Example
name: Visual Regression Tests

on: [pull_request]

jobs:
  visual-tests:
    runs-on: ubuntu-latest
    steps:
      - uses: actions/checkout@v3

      - name: Install dependencies
        run: npm ci

      - name: Install Playwright browsers
        run: npx playwright install --with-deps

      - name: Run visual tests
        run: npx playwright test --grep @visual

      - name: Upload test results
        if: failure()
        uses: actions/upload-artifact@v3
        with:
          name: visual-test-results
          path: test-results/
Baseline Management Strategy
The tricky part of visual testing in CI is managing baselines. Here are three approaches:
1. Commit baselines to Git (simple)
- Baselines stored in your repo alongside tests
- Easy to review in pull requests
- Can bloat repo size with binary images
2. Cloud-hosted baselines (Percy/Chromatic)
- Baselines stored in external service
- Automatic baseline updates on merge to main
- Requires external dependency and cost
3. Baseline artifacts (advanced)
- Store baselines as CI artifacts tied to main branch
- Download baselines at test time
- More complex setup but avoids repo bloat
Approval Workflows
Visual changes aren't always bugs - sometimes they're intentional design updates. Your workflow should make it easy to approve legitimate changes:
# Update baselines after approving visual changes
npx playwright test --update-snapshots

# Commit the new baselines
git add test-results/
git commit -m "Update visual baselines for new button styles"
git push
With Percy or Chromatic, approval happens in their web UI, and baselines update automatically when you merge to main.
Best Practices for Stable Visual Tests
1. Disable Animations
// Playwright config
use: {
  // Disable CSS animations and transitions
  reducedMotion: 'reduce',
}
2. Wait for Network Idle
await page.goto('/dashboard', {
  waitUntil: 'networkidle'
});
3. Use Consistent Fonts
Font rendering varies by OS. Either:
- Use web fonts loaded from a CDN (consistent across environments)
- Run tests in Docker with specific font packages installed
- Increase threshold tolerance for text-heavy pages
4. Test Components in Isolation First
Full-page screenshots are useful but hard to debug. Start with component-level tests using Storybook or by rendering components in isolation:
test('button component variants', async ({ page }) => {
  await page.goto('/test-page/buttons');

  await expect(page.locator('.button-primary')).toHaveScreenshot('button-primary.png');
  await expect(page.locator('.button-secondary')).toHaveScreenshot('button-secondary.png');
});
5. Organize Snapshots by Feature
tests/
  ├── auth/
  │   ├── login.spec.ts
  │   └── login.spec.ts-snapshots/
  │       └── login-page.png
  ├── dashboard/
  │   ├── dashboard.spec.ts
  │   └── dashboard.spec.ts-snapshots/
  │       ├── dashboard-desktop.png
  │       └── dashboard-mobile.png
6. Test Responsive Designs Explicitly
const viewports = [
  { width: 375, height: 667, name: 'mobile' },
  { width: 768, height: 1024, name: 'tablet' },
  { width: 1920, height: 1080, name: 'desktop' },
];

for (const viewport of viewports) {
  test(`homepage looks correct on ${viewport.name}`, async ({ page }) => {
    await page.setViewportSize(viewport);
    await page.goto('/');
    await expect(page).toHaveScreenshot(`homepage-${viewport.name}.png`);
  });
}
Common Pitfalls and How to Avoid Them
Pitfall 1: Testing Too Much at Once
Full-page screenshots of complex pages make debugging painful. When a test fails, you have to hunt for what changed. Instead, break tests into logical sections:
// Instead of one massive screenshot
await expect(page).toHaveScreenshot('entire-page.png');

// Test sections individually
await expect(page.locator('header')).toHaveScreenshot('header.png');
await expect(page.locator('main')).toHaveScreenshot('main.png');
await expect(page.locator('footer')).toHaveScreenshot('footer.png');
Pitfall 2: Not Mocking External Resources
Third-party widgets, ads, and external images can change unpredictably:
// Block external resources that you don't control
await page.route('**/*', (route) => {
  const url = route.request().url();
  if (url.includes('doubleclick.net') || url.includes('analytics')) {
    route.abort();
  } else {
    route.continue();
  }
});
Pitfall 3: Ignoring Flakiness Signals
If a visual test fails inconsistently, don't just increase the threshold. Investigate:
- Are animations still running?
- Is content loading asynchronously?
- Are fonts loading inconsistently?
- Is there a race condition in your rendering logic?
Flaky visual tests often expose real timing bugs in your application.
ROI: Is Visual Testing Worth It?
Visual regression testing has overhead - baselines to maintain, thresholds to tune, false positives to investigate. Is it worth it?
When visual testing pays off:
- You have a design system used across multiple teams
- You support multiple browsers or devices
- Visual quality is critical to your brand (e.g., e-commerce, portfolios)
- You're refactoring CSS or upgrading UI libraries
- You've shipped embarrassing visual bugs before
When to skip it:
- Your UI changes constantly and intentionally
- You have a small team that manually reviews every PR
- Your app is mostly back-end with minimal UI
- You don't have design consistency requirements
The Bottom Line
Visual regression testing fills a gap that traditional test automation misses. Functional tests verify behavior; visual tests verify appearance. Together, they give you confidence that your app works and looks right.
Start small: pick your most important user flow, add a few visual tests with Playwright's built-in capabilities, and see how it feels. If you catch even one visual bug before it reaches production, the investment was worth it.
And when that inevitable tweet comes in showing a broken layout, you can confidently reply: "That's impossible, our visual tests would have caught it." Then you realize you forgot to run them on Safari. But that's what the next sprint is for.
Related Posts
Vibe Break Chapter V: The Pixel Perturbation
Learn visual regression testing for AI-generated interfaces and catch pixel perturbations that damage credibility.
Foundation Book V: The Handoff Zone
Learn how to track and validate business flows across backend-frontend boundaries with Business-Use framework.
Test Wars Episode VII: Test Coverage Rebels
Join the rebellion against meaningless test coverage metrics. Learn how to build meaningful test suites.